
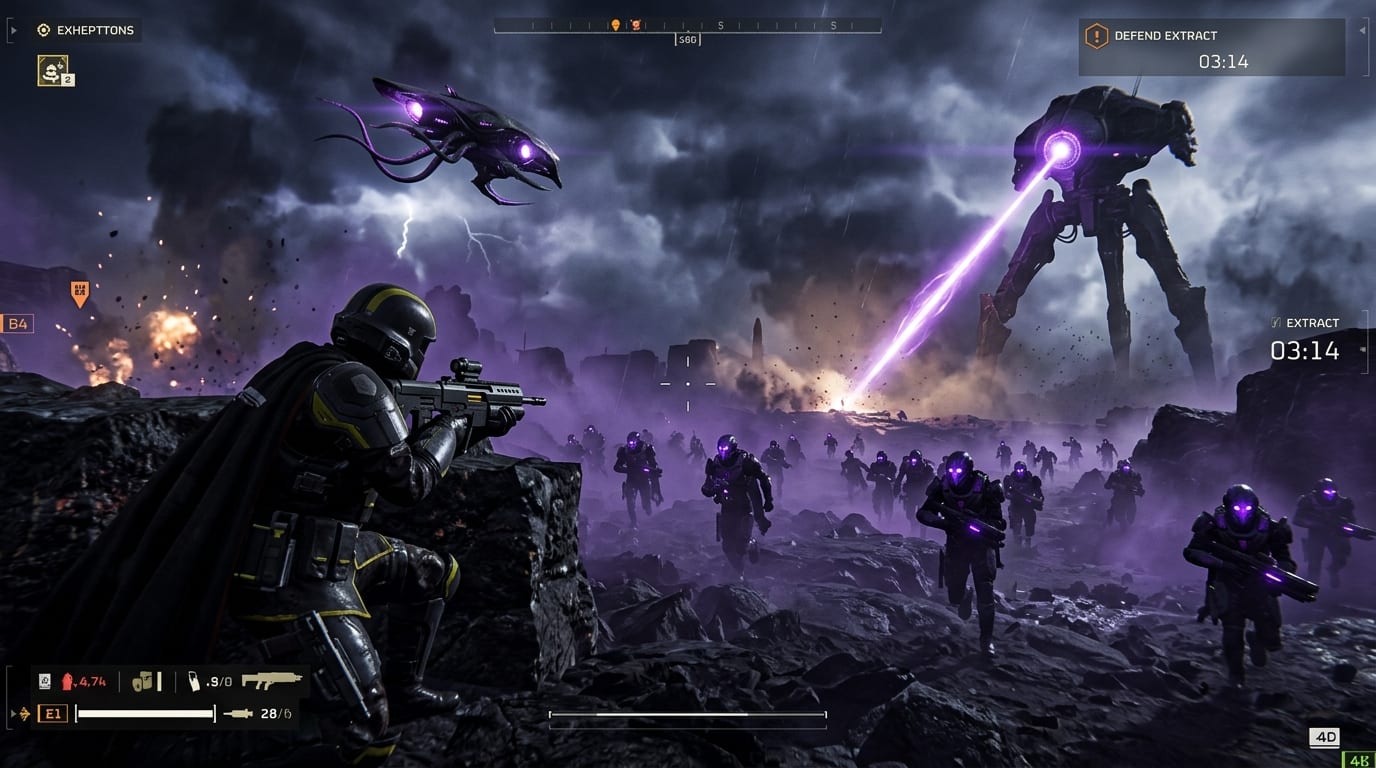
Last checked: September 21, 2026. This guide uses the official Devoid of Liberty 7.0.0 enemy changes as its factual baseline. Recheck the latest Arrowhead balance notes before treating any weapon as permanently optimal.
The Best Illuminate Loadout Is Built Around Coverage, Not a Tier List
The Illuminate can make a familiar mistake feel like a guaranteed death sentence. You spend too long clearing a crowd of Voteless, a Watcher calls reinforcements, an Elevated Overseer starts firing from above, and a Harvester walks into the fight before your anti-tank cooldown is ready. On Super Helldive, those problems rarely arrive one at a time.
That is why a useful Illuminate loadout needs to cover several jobs at once. You need reliable damage for the Voteless and Wretches, a way to pressure Overseers without wasting your entire magazine, a response to flying targets, and an anti-heavy option that can keep a Harvester or Crusher from deciding the fight for you.
The build below is a strong general-purpose starting point for high-difficulty Illuminate missions. It is not a promise that one setup will outperform every other loadout, and it is not a substitute for adapting to the mission map or your squad's roles. Its purpose is simpler: reduce the number of situations in which your team has no answer.
---
Recommended Super Helldive Illuminate Loadout
| Slot | Recommendation | Main Job |
| --- | --- | --- |
| Primary | LAS-16 Sickle or an incendiary/stagger shotgun | Sustained Voteless and Wretch clear |
| Secondary | P-40-K Bolt Pistol, if unlocked; otherwise a dependable medium-damage sidearm | Finishing medium targets and helping against exposed weak points |
| Support weapon | StA-X3 W.A.S.P. Launcher | Flying Overseers, distant targets, and heavy pressure |
| Backpack | Guard Dog “Rover” | Passive chaff control while you aim at priority targets |
| Stratagem 1 | Orbital Railcannon Strike | A high-value answer to a Harvester or other heavy target |
| Stratagem 2 | Eagle Airstrike or Orbital Precision Strike | Flexible objective, patrol, and emergency damage |
| Armor | Light or medium armor that matches your survivability preference | Movement, stamina, and enough protection to survive mistakes |
Title: The Core Coverage Principle
Badge: Tactical Doctrine
- Primary weapon keeps swarms from monopolizing your team's attention.
- StA-X3 W.A.S.P. Launcher neutralizes elusive aerial targets and long-range high-threats.
- Guard Dog "Rover" creates crucial breathing room against melee swarms.
- Offensive Stratagems are reserved strictly for heavy threats and objective emergencies.
This configuration follows a simple principle: the primary keeps the swarm from owning your attention, the W.A.S.P. handles targets that are difficult to hit, the Rover buys breathing room, and the two offensive stratagems cover heavy threats and emergencies.
If the W.A.S.P. Launcher is unavailable, use the Recoilless Rifle, Quasar Cannon, or another support weapon you can aim confidently. A familiar weapon used well is more valuable than a supposedly perfect pick that leaves you unable to manage the battlefield.
---
Why the Primary Weapon Matters More Than It Looks
The Illuminate are not only a heavy-target faction. Much of the danger comes from the way light enemies occupy your attention while stronger units attack from a different angle. A primary that clears one enemy at a time can leave you reloading when the fight is actually decided.
1. LAS-16 Sickle
The LAS-16 Sickle is attractive because it gives you sustained fire without asking you to carry a conventional magazine economy. Its trade-off is heat management. If you keep firing until the weapon overheats in the middle of a swarm, its ammunition advantage will not save you. Fire in controlled bursts when the pressure is low and keep moving when the Voteless close the distance.
2. Incendiary or Stagger Shotgun
An incendiary or stagger shotgun is a reasonable alternative for players who prefer close-range control. Fire damage continues to matter after you turn toward another threat, while stagger can create the small amount of space needed to stim, reload, or reposition. The weakness is obvious: you must fight closer, and poor spacing becomes much more dangerous when Wretches are present.
The primary does not need to solve every problem. It needs to remove the small targets quickly enough that you can use your attention and ammunition on the targets that can actually end the mission.
---
Enemy-by-Enemy Loadout Decisions
Voteless: Keep Moving and Avoid Wasting Heavy Ammunition
Voteless are the pressure layer of an Illuminate fight. They are dangerous because they consume time and block movement, not because each individual target requires a specialized counter.
Use the primary weapon, Rover, grenades, or an area-damage stratagem to thin them. Do not spend a W.A.S.P. missile or Orbital Railcannon Strike on a crowd you can outrun or clear with ordinary ammunition. Light armor and good movement are particularly valuable here because Voteless are easier to manage when you can create distance instead of standing still and trading damage.
The most important habit is to avoid letting the horde surround you. Back through open ground, use corners to break pursuit, and keep enough space to aim at the Watcher or Overseer that is making the crowd matter in the first place.
Watchers: Kill the Alarm Before the Battlefield Grows
Watchers are a priority target because they can bring more Illuminate into the fight. Their small size and movement make them easy to ignore while you are fighting at ground level, but allowing one to remain active can turn a manageable patrol into a reinforcement problem.
The W.A.S.P. is useful when a Watcher is difficult to reach or surrounded by other threats. Otherwise, a precise primary burst is usually the better trade. Scan the sky and the edges of the battlefield after every major engagement rather than assuming the most obvious target is the most important one.
Overseers: Aim for Consistency, Not Spectacular Damage Numbers
Overseers are the medium-threat core of the faction. They have better weapons, better durability, and more battlefield influence than the Voteless, but they are still mobile enough that standing in the open and trying to win a damage race is a poor plan.
Use cover whenever possible. Medium-damage weapons and accurate fire are more useful than a slow weapon that misses because the target is moving. The W.A.S.P. is especially valuable for Elevated Overseers and other flying targets because homing projectiles reduce the burden of tracking a moving enemy in a chaotic fight.
Do not tunnel on an Overseer while Voteless are closing behind you. Create space first, then take the shot. If the enemy is already inside your team's defensive line, call out the target so another player can help finish it rather than having several Helldivers waste their magazines independently.
Elevated Overseers and Flying Units: Where the W.A.S.P. Earns Its Slot
Ground-based anti-tank weapons can struggle when the target is moving through the air or changing elevation. The W.A.S.P. Launcher's homing capability gives it a different job from a conventional rocket launcher: it is not merely a heavy-damage tool; it is also a way to make aerial targets less difficult to hit under pressure.
Save enough ammunition for the threats that appear beyond comfortable primary range. A common mistake is spending every guided shot on the first visible medium target and then having no answer when a flying unit appears over the next objective.
If your squad already has reliable anti-air coverage, you can choose a different support weapon and let another player own this role. What matters is that the team has an answer, not that every Helldiver carries one.
Harvesters: Attack the Walker Before It Controls the Fight
Harvesters are heavy battlefield anchors. They force the squad to respect line of sight, movement lanes, and cooldown timing. The worst moment to discover that nobody brought anti-heavy damage is after the Harvester has already entered the objective area.
Use the Orbital Railcannon Strike for a genuine heavy threat rather than spending it casually on a medium unit. The W.A.S.P. can supplement the damage, while a Recoilless Rifle or Quasar Cannon gives other squad members a more direct response. If you are relying on a teammate's support weapon, coordinate before the mission begins so the entire squad does not assume someone else has the answer.
Do not stand in a predictable lane while firing. The Harvester's presence should change your movement. Fire, relocate, and use terrain so the rest of the squad can attack from more than one angle.
Crushers: Sustained Fire Over One Dramatic Hit
The official 7.0.0 patch notes describe the Crusher as able to regenerate while taking heavy damage. That changes the way you should approach it. A squad that damages the Crusher, disengages for too long, and then returns may have thrown away much of its progress.
The answer is not blind aggression. It is continuous, coordinated pressure. Assign the Crusher to one or two players, keep the damage coming, and use crowd-control tools to stop the surrounding Voteless from interrupting the attack. If you must retreat, retreat with a plan: preserve line of sight, maintain a safe firing position, and resume pressure as soon as the immediate swarm is under control.
This is one of the clearest reasons not to build a loadout around a single burst-damage trick. A weapon can look impressive against a stationary target and still perform badly if it leaves a long gap between meaningful hits.
Wretches: Protect Your Equipment and Keep Your Aim Calm
Wretches are fast, mobile, and disruptive. Arrowhead's official notes describe them as able to dodge and leap while advancing to dismantle a Helldiver's weapons. That means they are not simply another Voteless variant to ignore.
Prioritize them when they are inside your team's formation or approaching the player carrying the squad's most important support weapon. Use short controlled bursts rather than spraying wildly while they move. A stagger or fire-based primary can help create the space required to keep them away, but no weapon fixes poor awareness if the Wretch has already reached your blind side.
If a Wretch attack breaks your rhythm, do not immediately chase it into a crowd. Re-establish a safe angle, reload, and let the Rover or a teammate finish the target if possible.
---
Stratagem Choices and When to Swap Them
The Guard Dog “Rover” is valuable because it handles some chaff while you aim at Overseers or heavy targets. It is not a replacement for situational awareness. Watch its line of fire, avoid letting it distract you from a Watcher, and accept that backpack choice becomes a squad-role decision.
The Orbital Railcannon Strike is best treated as a limited heavy answer. Its value comes from deleting or severely damaging a target that would otherwise consume multiple players' attention. Call it early enough to matter; waiting until the Harvester is standing on top of the objective is usually too late.
For the final offensive slot, choose according to the mission. Eagle Airstrike is the flexible generalist: it can clear a cluster, punish an objective, or help finish a damaged heavy. Orbital Precision Strike is a better fit for players who prefer deliberate placement and a lower-commitment cooldown pattern. If the mission has dense structures or a squad that struggles with swarms, an area-control option can be more useful than another single-target strike.
The right choice also depends on what your squad already brings. Four overlapping anti-heavy stratagems may look powerful in the loadout screen but leave the team helpless when the battlefield fills with Voteless and Wretches.
---
Armor and Booster Considerations
Light armor makes sense for players who are comfortable using movement and terrain as their first layer of defense. It helps you disengage from Voteless, reposition around a Harvester, and avoid being trapped by a growing swarm.
Medium armor is the safer recommendation for players who are still learning the Illuminate attack patterns or who regularly get caught by ranged fire while moving between objectives. The extra durability can be worth more than a small movement advantage when the mission contains tight colony spaces.
For boosters, prioritize the needs your squad repeatedly fails to cover. Extra survivability, stamina, ammunition, and reinforcement value all have a place, but there is no universal combination that is correct for every map and team. A booster should solve a known problem rather than fill a slot because it appears in a popular screenshot.
---
Common Mistakes on Super Helldive
Title: 5 Critical Pitfalls to Avoid on Difficulty 10
Badge: Super Helldive Traps
- Bringing Only Anti-Tank Weapons: Four players staring at one heavy target while Voteless surround them is a wipe waiting to happen. At least one Helldiver must maintain dedicated horde-clear.
- Ignoring Watchers: The visible horde is rarely the root cause. If a Watcher remains active, your squad is trapped in an infinitely expanding reinforcement loop.
- Treating Every Objective as an Open-Field Fight: Illuminate colonies feature dense choke points. Always designate secondary egress paths before triggering alarms.
- Burning Heavy Cooldowns Early: Expending a Railcannon on a medium Overseer leaves you helpless when the first Harvester steps into view.
- Standing Still for Big Damage: Firepower cannot compensate for getting flanked, losing line of sight, or getting pinned by ranged plasma.
---
A Practical 4-Player Squad Split
A four-player team does not need four identical builds. One practical division of labor is:
- Chaff Clearer: High-ammo primary, Guard Dog "Rover" or area-control stratagems, and enough mobility to keep Voteless off the team's firing line.
- Air & Medium-Target Specialist: StA-X3 W.A.S.P. Launcher or another accurate support weapon, with primary responsibility for Elevated Overseers and Watchers.
- Heavy Specialist: Recoilless Rifle, Quasar Cannon, or Railgun for fast, decisive Harvester and Crusher counterplay.
- Flexible Objective Specialist: Eagle Airstrike, Orbital Precision Strike, defensive smoke/EMP utility, or a secondary anti-heavy option depending on the mission biome.
These labels are responsibilities, not rigid classes. Players should always remain capable of defending themselves if separated. The goal is simply to prevent the squad from discovering halfway through an objective that everyone brought the same answer to a different problem.
---
Final Recommendation
Start with the Sickle or an incendiary/stagger primary, a dependable secondary, the W.A.S.P. Launcher, Guard Dog “Rover,” Orbital Railcannon Strike, and a flexible Eagle or Precision strike. Then change one slot when the mission exposes a weakness.
- If Voteless are overwhelming the team, add more sustained area control.
- If Harvesters are surviving too long, assign a dedicated heavy player and stop spending anti-tank ammunition on medium targets.
- If flying Overseers are the main cause of deaths, prioritize accurate or homing fire and keep a clear line of sight to the sky.
The best Illuminate loadout is not the one that looks strongest in a tier list. It is the one that gives your squad a sensible answer to the next problem without leaving the current one unfinished.
---
Performance & Optimization Tools
Are you experiencing frametime drops when swarms of Illuminate enemies and Void effects flood your screen?
- Test your CPU and GPU headroom with our PC Game Requirements Checker.
- Benchmark your resolution and graphics settings using our FPS & Bottleneck Calculator.
- Share your squad loadouts, strategies, and Super Helldive clips with the community on the Game Vault Forum.